

Ethan Brooks
Focused on sustainable practices, careful seed selection, and hands-on experience, our family work closely with nature to produce quality harvests while continuously learning and improving each year..
Latest Posts


Archive
Tags
Social Links
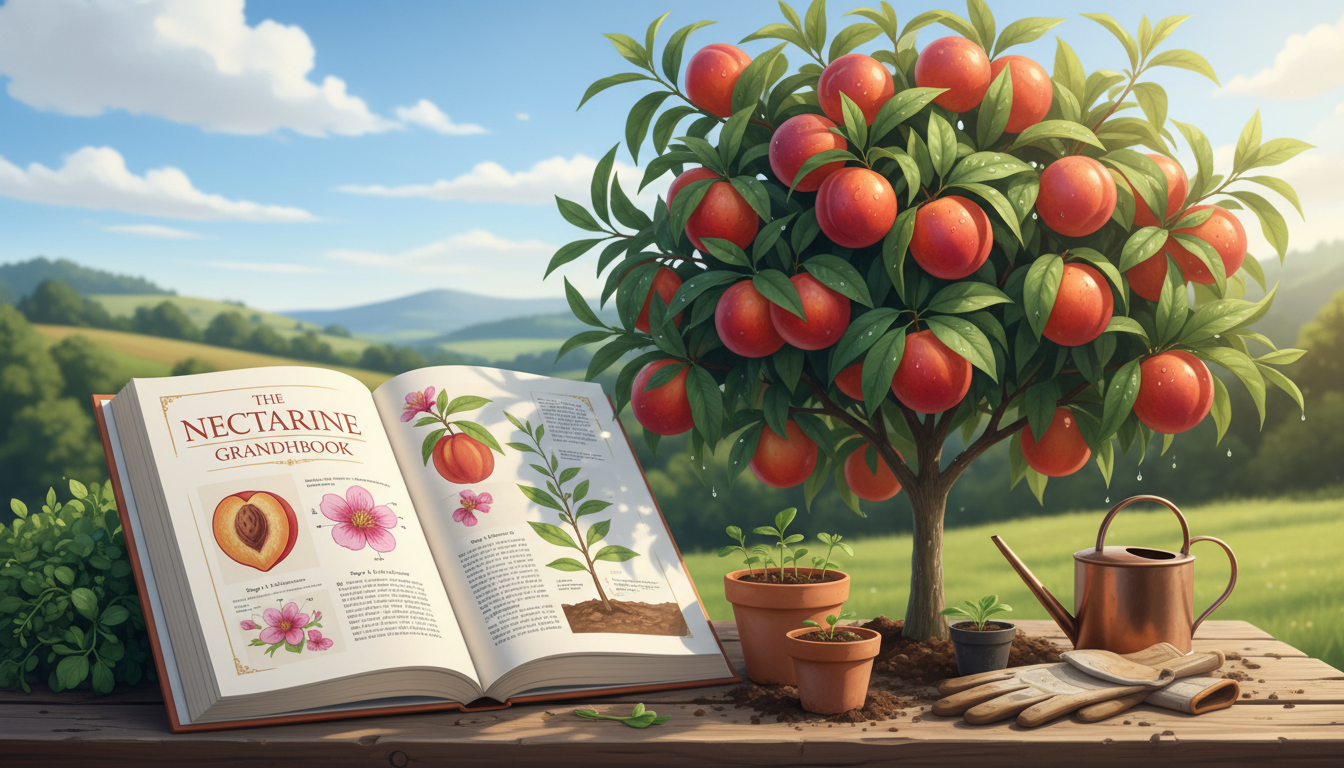

Welcome to the delightful journey of nurturing your very own nectarine tree at home! This adventure promises not just a beautiful addition to your garden but also the joy of harvesting sweet, sun-ripened fruit.
In this friendly guide, I’ll share everything from selecting the right variety to ensuring your tree thrives. You might be surprised to learn that understanding how to cultivate these trees is easier than you think.
With my experiences and a few lessons learned, you’ll feel confident in planting and caring for your nectarine tree. Imagine the taste of a fresh, homegrown nectarine, still warm from the sun, knowing you nurtured it yourself!
Whether you have a large backyard or a small garden, there’s a perfect nectarine tree waiting for your care.
Key Takeaways
- Growing a nectarine tree can be a rewarding experience.
- Choosing the right variety is crucial for success.
- Proper care and guidance make the process easier.
- Enjoy the satisfaction of harvesting your own fruit.
- Even small spaces can accommodate a thriving tree.
Introduction: Why I Love Growing Nectarine Trees
Growing nectarines has become one of my favorite gardening pursuits. The first time I tasted a homegrown nectarine, it changed my entire perspective on fruit forever. The sweetness and juiciness of that fruit made me realize the joy of growing my own.
Stepping into my garden on a warm summer morning, I feel pure joy. I pluck a perfectly ripe nectarine straight from the branch, still cool from the night air. That moment is magical, and it reminds me of why I cherish these trees.
Nectarines hold a special place in my heart among all the fruit trees I’ve nurtured over the years. Their smooth skin and intensely sweet flavor create an unforgettable experience. Each bite transports me back to those sunny days spent in my garden.
These trees have been a constant source of delight season after season. They reward me with fragrant spring blossoms and abundant summer harvests. Watching the trees bloom and bear fruit connects me to nature’s rhythms, deepening my appreciation for where my food comes from.
Surprisingly, nectarines are easy to grow and self-fertile. You don’t need a second tree to enjoy a bountiful crop of fruit. This accessibility makes them perfect for any home gardener.
I invite you to join me on this journey. Discover why I believe every home gardener should make space for at least one nectarine tree in their landscape. The rewards are endless, and the experience is truly fulfilling.
Nectarine Tree Basics: What You Should Know
Let’s dive into the essentials of nectarine trees, a fascinating group of stone fruits. These trees are closely related to peaches, yet they stand out with their smooth skin. This unique characteristic is due to a single recessive gene, which gives nectarines their delightful fuzz-free texture.
Nectarines are available in various varieties. Among my favorites are the richly flavored Fantasia and the creamy white-fleshed Heavenly White. If you’re in a colder climate, the cold-hardy Hardired is an excellent choice. Each variety brings its own charm and flavor profile to your garden.
When selecting your nectarine tree, consider the difference between freestone and clingstone varieties. Freestone nectarines have flesh that easily separates from the pit, making them a joy to eat. In contrast, clingstone types hold onto their pits tightly, which can be a bit trickier for snacking.
There are also standout options like the disease-resistant Harko and the low-chill Arctic Jay, perfect for warmer climates. Don’t forget the unique donut-style Honey Halo, which is a fun addition to any garden.
Nectarine trees thrive in USDA growing zones 5 through 9, making them accessible to many gardeners across the United States. I’ve enjoyed both yellow-fleshed and white-fleshed varieties. Generally, white nectarines tend to be sweeter, while yellow ones offer that classic tangy-sweet balance.
Another great aspect of these trees is that they are self-fertile. This means you can successfully cultivate just one tree and still enjoy a bountiful harvest of delicious fruit. With the right care, your nectarine tree will flourish and provide you with delightful fruits for years to come.
Understanding Nectarine Tree Sizes and Shapes
Nectarine trees come in a delightful variety of sizes and shapes, making them suitable for any garden space. Whether you have a sprawling yard or a cozy balcony, there’s a perfect tree for you.
Standard nectarine trees typically reach heights of 15 to 25 feet. These full-sized trees provide ample shade and produce a generous amount of fruit. If you have the space, a standard tree can be a beautiful centerpiece in your garden.
For those with limited space, compact dwarf varieties are an excellent choice. These trees usually stay around 6 to 10 feet tall, making them perfect for small gardens or even containers. I’ve grown charming varieties like the Mini Nectar Babe and Garden Delight, which produce full-sized fruit despite their petite stature.
Columnar nectarine trees, such as Sugar Pie and Flavor Gold, are another fantastic option. They grow upright and narrow, making them ideal for tight spots. These trees can add a unique visual element to your landscape while still providing delicious fruit.
Choosing the right size from the start is crucial. It saves you years of frustration and helps your nectarine tree thrive in its designated home. Semi-dwarf varieties offer a wonderful middle ground, combining manageable height with generous harvests.
Container growing is absolutely possible with the right dwarf variety. This makes it easy for apartment dwellers to enjoy the experience of nurturing a nectarine tree on a sunny balcony.
As you consider your long-term landscape goals, think about the size of the tree you want. These plants will be a beautiful part of your garden for many years, rewarding you with sweet, juicy fruit.
Choosing the Right Location for Your Nectarine Tree
Selecting the right spot for your nectarine tree is essential for a fruitful harvest. A well-chosen location can make all the difference in your gardening success.
First and foremost, your tree needs a minimum of six hours of direct sunlight each day. This sunlight is crucial for healthy fruit production. Without it, your tree may struggle to thrive.
Next, consider planting your tree in a protected area. Avoid low spots where cold air can settle. These areas can expose your tree to damaging spring frosts that may wipe out blossoms and reduce your yield.
Another important factor is soil drainage. Nectarine trees won’t tolerate waterlogged soils. If water stands in an area for more than an hour after rain, you should find a different spot. This will help ensure your tree’s roots remain healthy.
Good air circulation is also vital. It helps reduce disease pressure and allows the foliage to dry quickly after rain or morning dew. This simple step can significantly improve your tree’s health.
When choosing a location, think about the mature size of your tree. Ensure it won’t shade out other plants or interfere with structures as it grows. This foresight can save you headaches down the road.
If you live in a cooler climate, consider planting on a south-facing slope or near a wall. These locations can provide extra warmth, extending your growing season and helping your fruit ripen fully.
Finally, take the time to observe your garden throughout the day. Note where sunlight falls and where winter winds might pose a threat. This observation will guide you in making the best decision for your nectarine tree.
Remember, the right location sets your tree up for decades of success. Investing time in this decision is one of the best choices you can make for your gardening journey.
Preparing Your Soil and Garden for Planting
Preparing your garden for a new tree can be an exciting step in your gardening journey. The right soil conditions are vital for the health of your nectarine tree. Let’s walk through the essential steps to ensure your soil is ready for planting.
Start by testing the pH of your soil. Ideally, it should be around 6.5 for optimal tree health. If the pH is off, consider adjusting it to create a more suitable environment.
Next, enhance your soil by adding generous amounts of organic matter. Well-rotted compost can significantly improve both heavy clay and sandy soils. This addition creates the perfect environment for roots to establish.
One of my favorite techniques is digging a wide planting hole. Mix the native soil with compost to give your young tree the best possible start. This approach helps ensure that your tree has access to the nutrients it needs.
Nectarine trees absolutely demand well-draining soil. Addressing drainage issues before planting is crucial. It prevents root rot and saves you from headaches later on.
Consider adding a three to four inch layer of arborist mulch chips around the planting area. This layer helps retain moisture, regulate soil temperature, and suppress weeds. Just remember to keep the mulch pulled back a few inches from the trunk to prevent bark rot and rodent damage.
It’s also important to clear the planting area of grass and weeds. These plants compete with young fruit trees for water and nutrients during those critical first years. A clean area gives your nectarine tree the best chance to thrive.
If you’re working with container plants, always use a quality potting mix with added compost. Avoid using garden soil, as it can compact and drain poorly in pots.
How to Grow Nectarine Trees from Seed
Embarking on the journey of cultivating nectarine trees from seed is an exciting adventure. It allows you to experience the joy of nurturing your own fruit from the very beginning. I want to share my personal experience and guide you through the process step by step.
Step-by-Step Seed Preparation
First, I saved the pits from the most delicious nectarines I could find. After collecting them, I let the pits dry at room temperature for about a month. This step is crucial as it prepares the seeds for the next phase.
Next, I laid the pits on their sharp edge and carefully tapped them with a hammer. This action helps release the almond-like seed inside without damaging it. It’s important to be gentle during this process to ensure the seed remains intact.
Sprouting and Potting Your Seedlings
Once I had extracted the seeds, I filled a jar with potting soil. I added just a bit of water to dampen the soil and then tucked the seeds inside. After sealing the jar, I gently tumbled it around and placed it in the back of the fridge. This cold stratification period is essential for breaking dormancy.
After nearly four months in the fridge, I first noticed rootlets emerging. This was an exciting moment! In just two weeks after planting the seeds in pots, I saw green sprouts starting to emerge. Watching those tiny seedlings grow steadily into healthy young nectarine trees was truly rewarding.
It’s fascinating to note that nectarine trees grown from seed can produce fruit in as little as three years. Unlike apples, stone fruits often grow true to the parent tree’s characteristics. This means you can expect delicious nectarines just like the ones from which you started.
I encourage you to try this rewarding way of growing nectarines. It’s a fulfilling experience that I’ve also successfully used with peaches, plums, and apricots. With patience and care, you’ll soon have your own thriving nectarine trees!
| Step | Description |
|---|---|
| 1 | Save and dry pits from delicious nectarines for a month. |
| 2 | Carefully crack open the pits to extract the seeds. |
| 3 | Fill a jar with damp potting soil and add the seeds. |
| 4 | Seal the jar and place it in the fridge for cold stratification. |
| 5 | After four months, pot the sprouted seeds in individual containers. |
| 6 | Water well and watch your seedlings grow into trees! |
Planting Established Nectarine Trees
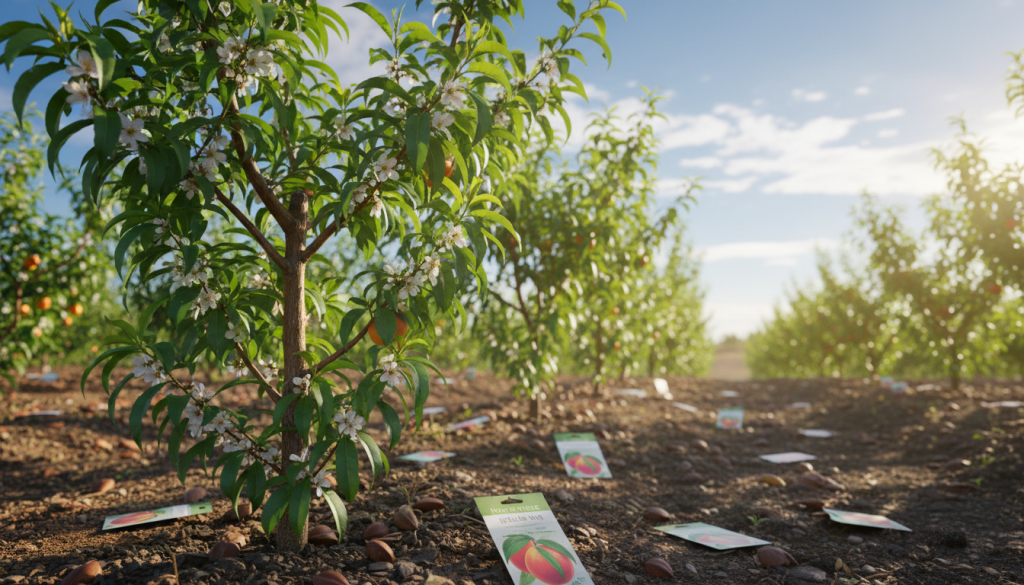
Planting an established nectarine tree is an exciting milestone in your gardening journey. This step sets the stage for future growth and fruit production. Let’s explore the best techniques to ensure your tree thrives in its new home.
First, it’s essential to dig a planting hole that accommodates the roots comfortably. Aim for a diameter of about three feet. This width allows for ample space for the roots to spread out and establish themselves.
Next, gently remove the tree from its pot. Take care to loosen any circling roots, as this will help prevent future growth issues. Position the tree at the same depth it was growing in its nursery container. Never plant it deeper than that, as this can harm the roots.
After positioning the tree, backfill the hole with the native soil you removed. This method encourages the roots to spread into the surrounding area, promoting healthy growth. Avoid heavily amending the soil, as this can create a barrier for the roots.
Watering deeply right after planting is crucial. This action settles the soil around the roots and eliminates any air pockets that could dry them out. Aim for about 7 ½ to 10 gallons of water per week for your young tree.
Consider applying a root-boosting product, like Nature Hills Root Booster, at planting time. This product provides essential nutrients that support lifelong health for your nectarine tree.
When planting multiple trees, proper spacing is vital. Standard nectarine trees need about 15 to 20 feet between them, while dwarf varieties can be planted closer together. This spacing allows each tree enough room to grow without competing for resources.
Lastly, remember that the first year after planting is critical for establishment. Consistent watering during this time makes all the difference for your young fruit trees. With care and attention, your nectarine tree will flourish and reward you with delicious fruit for years to come.
Growing Nectarine Trees in Containers
Growing nectarines in containers offers a wonderful opportunity for those with limited garden space. This method allows you to enjoy the beauty and flavor of these delightful fruits right at home. With the right approach, even a small patio or balcony can become a thriving nectarine garden.
Start by choosing the right dwarf variety. Some of my favorites include El Dorado, Pix Zee, and Nectar Babe. These trees are perfect for container growing and produce delicious fruit.
Next, you’ll need a substantial container. A pot of at least 25 gallons is essential. This size provides enough room for healthy root development and stable growth. Remember, a well-sized pot can make all the difference.
Using a quality potting soil mix with added compost is critical. Avoid using garden soil, as it can compact in pots and suffocate roots. Instead, opt for a mix that promotes drainage and aeration.
Watering is another vital aspect of container gardening. Saturate the soil until water flows from the drainage holes. Afterward, let the top inch or two of soil dry out before watering again. This routine helps maintain healthy moisture levels.
Container growing opens up nectarine cultivation to those with limited space. You can position your potted tree in a sunny spot, ensuring it receives full sun. Also, protect it from strong winds that might tip over top-heavy containers.
Keep in mind that container trees need more frequent fertilization than those planted in the ground. Nutrients leach out with regular watering, so be sure to provide them with a balanced fertilizer.
Even a dwarf nectarine tree in a pot can produce an impressive harvest of full-sized fruit. With proper care and attention, you’ll enjoy the sweet rewards of your efforts.
Watering Your Nectarine Tree for Success
Ensuring your nectarine tree receives the right amount of water is vital for its health and productivity. A well-hydrated tree is more likely to produce juicy, delicious fruit. My watering strategy focuses on a simple yet effective rule: your tree needs about an inch of water each week over its entire root zone.
In practical terms, this means that a typical three-foot diameter planting area requires approximately seven and a half to ten gallons of water weekly. It’s important to avoid the common mistake of light daily watering. This approach may leave the surface wet while the deeper roots remain dry and stressed.
To check soil moisture, I dig down a few inches. The soil should feel moist but never soggy, ideally to a depth of about one foot. During the hot summer months, I increase my watering frequency, while scaling back during cooler periods. This adjustment helps maintain the right moisture levels.
- Consider using a drip irrigation system with emitters placed about a foot from the trunk. This method delivers water slowly and deeply, right where the roots need it most.
- A good layer of mulch around the base of your tree can significantly reduce water loss from evaporation. It also keeps the root zone cool during scorching weather.
- Be aware that wilting can indicate either too much or too little water. Always check the soil before reaching for the hose.
Remember, the key is to provide deep, occasional watering rather than frequent, shallow watering. This encourages the roots to grow deeply, ensuring your tree is well-established and resilient. If you’re interested in learning more about soil moisture and care for your plants, check out this resource on growing stone fruits.
As your tree matures, regular rainfall should suffice, but during dry spells, be prepared to supplement with additional watering. A well-cared-for nectarine tree will reward you with an abundance of sweet fruit for years to come!
Fertilizing and Nourishing Your Tree
Nourishing your nectarine tree is essential for its health and productivity. A well-fed tree can yield an abundance of delicious fruit. I want to share my approach to fertilizing these trees to ensure they thrive.
First, I recommend using a balanced organic fruit tree fertilizer. Applying it in late winter through early summer promotes steady growth. This timing helps the tree build strength for the growing season ahead.
Another effective method is to spread a couple of inches of well-rotted compost over the root zone each spring. This simple step nourishes the soil and supports healthy root development. It’s one of the easiest ways to give your trees the nutrients they need.
However, it’s important to avoid fertilizing after early summer. Doing so can push soft new growth that is more vulnerable to winter cold damage. I always check my trees for signs of healthy growth before deciding on additional fertilization.
As a general guide, if your tree produces about a foot of new growth each year and has rich green foliage, it may not need much fertilizer. This observation helps me gauge the tree’s nutrient needs accurately.
Soil testing is also a vital step. Understanding what nutrients your soil may lack can guide you in making the right amendments. Over-fertilizing can reduce fruit quality and increase disease problems, so a light hand is often best.
Mulching with leaves or straw is another beneficial practice. It slowly builds soil fertility and supports beneficial organisms that keep trees healthy. Additionally, for container-grown nectarine trees, more frequent feeding is necessary. Nutrients wash out of pots with regular watering, so be prepared to supplement regularly.
| Fertilization Method | Details |
|---|---|
| Organic Fertilizer | Apply in late winter through early summer for steady growth. |
| Well-Rotted Compost | Spread a couple of inches over the root zone each spring. |
| Avoid Late Fertilization | Do not fertilize after early summer to prevent soft growth. |
| Soil Testing | Check nutrient levels to avoid over-fertilizing. |
| Mulching | Use leaves or straw to build soil fertility and support beneficial organisms. |
| Container Trees | Need more frequent feeding due to nutrient washout. |
Pruning Nectarine Trees for Better Fruit and Growth
Pruning is a vital practice that can enhance the health and productivity of your nectarine trees. It’s one of the most important skills you can develop as a gardener. Proper pruning not only improves the quality of fruit but also helps your trees live longer.
When I prune my young trees, I focus on establishing a strong framework. I ensure that branches are spaced at least six inches apart. This spacing allows good light penetration, which is crucial for healthy growth.
Each year, I follow a routine that includes removing crossing branches and dead wood. This practice helps keep the center of the tree open, allowing air circulation and light to reach all parts of the tree.
Controlling the height of my trees is another essential aspect of pruning. I pinch back new growth during the summer to keep fruit within easy reach. This method also helps maintain a manageable tree size.
Sometimes, trees set too heavy a crop. Thinning the fruit improves the size and quality of the remaining nectarines. It also prevents branches from breaking under the weight of too many fruits.
The best time for major pruning is late winter or early spring, just before new growth begins. During this time, the tree’s structure is clearly visible, making it easier to decide what to remove.
An open canopy allows bees to move freely among blossoms. It also helps sunlight reach the fruit, resulting in sweeter nectarines. Don’t be intimidated by pruning; these trees are forgiving. Each year, you’ll gain confidence in shaping your fruit trees.
| Pruning Task | Details |
|---|---|
| Establish Framework | Space branches at least six inches apart for light penetration. |
| Annual Routine | Remove crossing branches and dead wood to keep the center open. |
| Height Control | Pinch back new growth to maintain manageable tree size. |
| Fruit Thinning | Thin excess fruit to improve size and prevent branch breakage. |
| Best Time for Pruning | Late winter or early spring before new growth starts. |
| Open Canopy Benefits | Allows bees to pollinate and sunlight to ripen fruit evenly. |
Managing Pests and Diseases
Managing pests and diseases is crucial for maintaining the health of your nectarine trees. Every gardener encounters these challenges, especially when it comes to growing fruit trees. Understanding the common pests and diseases that affect your trees can help you take proactive steps for their care.
Common Pests and How to Control Them
One of the most notorious issues is peach leaf curl. This disease causes new leaves to blister, deform, and eventually die. To control it, I recommend applying lime and sulfur starting in mid-December and repeating every three to four weeks through winter.
Aphids are another common pest. These small insects can weaken your trees by sucking sap. I often encourage natural predators like ladybugs and parasitic wasps to help control their populations. When necessary, I use insecticidal soap to manage outbreaks.
Additionally, the cherry slug larvae can skeletonize leaves during the summer. I find that using insecticidal soap, spinosad, or a strong water spray can effectively manage them.
Disease Prevention and Treatment
Another concern is brown rot, which leads to wilting and death of twigs and blossoms. Fruits may turn gray-brown and mummify on the tree. To combat this, promptly remove any infected twigs or mummified fruits. Applying copper, sulfur, or lime-sulfur fungicide is also effective.
Bacterial canker can present a serious threat, marked by sunken blackish cankers on stems or trunks. I recommend using copper fungicide in early fall and again in January to control this disease.
Healthy nectarine trees resist pests and diseases better, so proper watering, pruning, and nutrition are your first line of defense. Regular monitoring of your fruit trees throughout the growing season allows you to catch problems early, ensuring the quality of your fruits.
| Pest/Disease | Symptoms | Control Methods |
|---|---|---|
| Peach Leaf Curl | Blistered, deformed leaves that eventually die. | Lime and sulfur sprays starting mid-December. |
| Aphids | Weakening of trees due to sap-sucking. | Encourage natural predators; use insecticidal soap if needed. |
| Cherry Slug | Leaves skeletonized by larvae. | Insecticidal soap, spinosad, or strong water spray. |
| Brown Rot | Wilting twigs, gray-brown fruits. | Remove infected material; apply copper or sulfur fungicide. |
| Bacterial Canker | Sunken blackish cankers on stems or trunk. | Copper fungicide in early fall and January. |
Protecting Your Nectarine Trees from Winter and Frost
Winter can be a challenging time for your nectarine trees, requiring special care and attention. The cold months pose real risks, from killing frosts that can destroy spring blossoms to sunscald that can split the bark on sunny, cold days. Proper winter care is essential for a fruitful growing season ahead.
One effective method I use to protect my trees from sunscald is whitewashing the trunk and lower limbs. This involves mixing interior latex paint with water in a 50/50 ratio and applying it each fall. This simple step helps reflect sunlight and protects the bark until it thickens.
Preparing your nectarine trees for winter also includes applying a thick layer of mulch over the root zone after the ground freezes. This mulch acts as insulation, preventing heaving and protecting the roots from extreme temperature fluctuations.
When it comes to protecting early blooms from late spring frosts, I cover smaller trees with frost cloth when temperatures are forecast to dip. This simple action can save a season’s worth of fruit from being lost due to a few degrees of cold.
It’s crucial to plant your trees in a protected area, away from frost pockets. Cold air naturally settles in low spots, which can wipe out an entire season’s fruit. Observing your garden can help you identify the best spots for planting.
Even in colder zones, selecting hardy varieties bred for northern climates gives your nectarine trees the best chance of surviving harsh winters. Container-grown trees need extra winter protection since their roots are more exposed. I often move pots against a warm south-facing wall to shield them from the cold.
Remember, proper winter care sets the stage for healthy spring growth and a bountiful harvest in the year ahead. Taking these steps will ensure your nectarine trees thrive through the winter and produce delicious fruit when the warm weather returns.
| Winter Protection Method | Description |
|---|---|
| Whitewashing | Mix interior latex paint with water (50/50) and apply to the trunk and lower limbs. |
| Mulching | Apply a thick layer of mulch over the root zone after the ground freezes. |
| Frost Cloth | Cover smaller trees with frost cloth during predicted cold snaps. |
| Protected Planting Area | Choose locations away from frost pockets to prevent cold damage. |
| Hardy Varieties | Select varieties suited for northern climates for better winter survival. |
| Container Care | Move pots against a warm wall for added protection from the cold. |
Harvesting Your Nectarines: When and How
The moment has finally arrived to enjoy the fruits of your labor with your nectarine trees. Recognizing when nectarines are perfectly ripe is essential for a successful harvest. Look for rich color development and a slight softening of the flesh near the stem. These signs indicate that your nectarines are ready to be picked.
Every summer, I perform a simple test. I gently cup the fruit in my palm and give it a slight twist. If it releases easily from the branch, it’s time to harvest! This method ensures that I only pick the ripest fruits.
Harvesting your first homegrown nectarines is an incredible experience. They come straight from the tree, still warm from the sun, offering a fragrance and sweetness that store-bought fruit simply can’t match. It’s a moment of pride and joy!
Nectarine trees typically begin bearing fruit three to five years after planting. However, if you choose trees with mature root systems, you may enjoy fruit much sooner. The wait is worth it when you finally taste your own nectarines.
As for the harvest season, different varieties ripen at different times. Some may be ready as early as summer, while others might not be ready until late summer or even into fall. Keep an eye on your trees as the season progresses.
When handling ripe nectarines, be gentle to avoid bruising. After picking, store them properly to extend their freshness. Unlike peaches, nectarines have that wonderful smooth skin, making them perfect for eating fresh right off the tree without any peeling.
As you savor the moment of that first harvest, remember that all your care and patience have resulted in something truly special from your own garden. Enjoy every bite of your delicious nectarines!
Troubleshooting Common Growing Challenges
Every gardener faces challenges, and growing nectarines is no exception. I want to share some of the most frustrating issues I’ve encountered with my nectarine trees and offer practical solutions that have worked for me.
One common problem is the presence of scale insects. These pests appear as small barnacle-like bumps on branches and leaves. To control them, I recommend applying a dormant oil spray in early spring before the buds break. This treatment can effectively reduce their numbers and keep your trees healthy.
Another challenge is dealing with deer. They often browse on shortened branches, leaving your trees looking ragged. Installing fences or cages at least eight feet tall can deter these hungry visitors and protect your precious plants.
Birds can also be a nuisance, as they may peck at your fruits, leaving gaping holes or even stealing them altogether. I’ve found that using reflective bird scare tape or bird netting can save your harvest from disappearing overnight.
Additionally, voles, mice, and rabbits can cause significant damage by chewing bark around the base of trees. To prevent this, keep mulch pulled back four to six inches from the trunk. This simple step can save your trees from serious harm.
If you notice yellowing or curling leaves, these symptoms may not always indicate disease. Often, they point to nutrient deficiencies or inconsistent watering. Regularly checking your soil and adjusting your watering schedule can help maintain healthy foliage.
Sometimes, your nectarine tree might not be producing fruit. Common causes include insufficient chill hours, over-fertilization, or improper pruning. Understanding these factors can help you troubleshoot and encourage fruit production.
It’s also worth noting that young nectarine trees need time to mature. If your tree is focusing its energy on growth, it may simply need another year before it starts bearing fruit.
Lastly, I encourage you to view challenges as learning opportunities. Even experienced gardeners face setbacks with their fruit trees from time to time. Embrace the journey, and remember that each challenge can teach you something valuable.

Conclusion
At the end of this journey, I hope to inspire you to embrace the beauty of growing your own fruit trees. Reflecting on my experiences, I can say that nurturing these trees has brought immense joy and fulfillment to my life.
Every expert gardener was once a beginner. The best way to learn is simply to plant a tree and grow alongside it through the years. With the right variety, a sunny spot, consistent water, and a little patience, you’ll be harvesting delicious nectarines before you know it.
There’s something profoundly satisfying about growing your own fruit at home. It connects you to the seasons and the simple pleasures of the garden. I encourage you to take that first step, whether it’s ordering a dwarf tree for your patio or preparing a sunny spot in your yard.
As you embark on this adventure, I am excited for you and the delicious summers ahead, filled with the incomparable taste of sun-warmed nectarines picked from your very own trees. Feel free to revisit this guide whenever you need a refresher, knowing that each year brings new lessons and even more abundant harvests.