

Ethan Brooks
Focused on sustainable practices, careful seed selection, and hands-on experience, our family work closely with nature to produce quality harvests while continuously learning and improving each year..
Latest Posts


Archive
Tags
Social Links
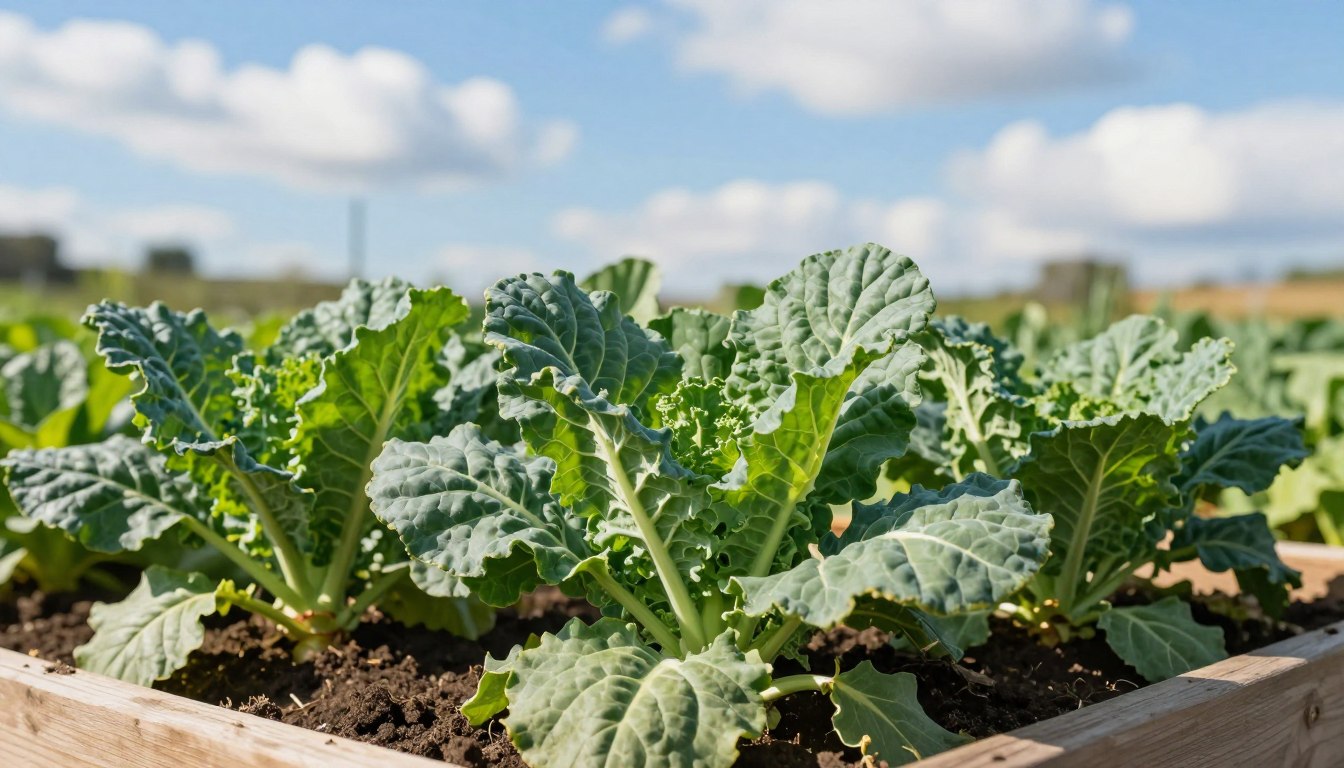

Want a hardy, delicious addition to your backyard? Collard greens are a fantastic choice for any gardener. I’m here to show you the simple path to a lush, productive patch.
These leafy vegetables are tough and thrive in cool weather. Master Gardener Andy Wilcox notes they are a member of the Brassicaceae family. They are a favorite in the American South, Africa, and South America.
Cultivating your own bed is a deeply rewarding experience. It provides fresh, nutritious produce right from your kitchen table. I will guide you through every simple step needed for success.
My goal is to make this process accessible and enjoyable for every beginner. You can achieve a successful harvest of flavorful leaves. This easy grow method keeps your plot productive through the seasons.
By following along, you’ll enjoy the satisfaction of harvesting your own food. For detailed planting advice, check out this resource on growing collards.
Key Takeaways
- Collard greens are a tough, cool-weather crop.
- They belong to the Brassicaceae plant family.
- This vegetable is a staple in Southern U.S. cuisine.
- Growing your own provides fresh, nutritious leaves.
- The process is straightforward and rewarding for beginners.
- Plants can be grown in garden beds or containers.
- A successful harvest offers great personal satisfaction.
Introduction to My Collard Greens Journey
Embarking on a gardening project, I sought a crop that could withstand unpredictable weather. My search led me directly to a robust, leafy vegetable. This choice marked the start of a truly rewarding experience.
Why I Chose Collard Greens
I needed a reliable, cold-hardy option for my home plot. These specific plants are famously tough. Master Gardener Andy Wilcox calls their look “prehistoric,” adding unique beauty to any space.
Their resilience against frost made them a perfect fit. I also valued their continuous harvest potential. The table below shows why they stood out compared to other popular leafy varieties.
| Feature | Collard Greens | Other Leafy Greens (e.g., Kale, Spinach) |
|---|---|---|
| Cold Hardiness | Excellent; survives frost | Good to moderate |
| Growth Speed | Steady, moderate pace | Often faster but less hardy |
| Pest Resistance | Generally high | Varies; some are pest-prone |
| Aesthetic Appeal | Large, bold, textured leaves | Softer, smaller foliage |
| Culinary Versatility | Staple in Southern & global cuisines | Widely used in salads & smoothies |
Overview of the Guide
This resource walks you through nurturing a seed into a robust producer. I share my personal trials to help you sidestep common errors. You’ll see why these nutritious, dark green leaves are a culinary cornerstone.
My goal is to simplify every step. You will gain the confidence to manage your own productive patch. Let’s begin this journey together.
Understanding the Benefits and History of Collard Greens
My appreciation for these plants deepened when I discovered their ancient origins and health benefits. Cultivated globally for over 2000 years, they are a significant source of nutrition.
Nutritional Value and Health Benefits
As Andy Wilcox notes, they belong to the Brassica oleracea species. This family includes kale, cabbage, cauliflower, and broccoli.
Their dark leaves are packed with vitamins A and C, plus manganese. They also provide essential minerals like iron, magnesium, calcium, and potassium.
This nutrient profile supports a balanced diet and overall wellness.
A Brief Look at Collard Greens in Culinary Tradition
In the kitchen, these vegetables are versatile. Their tough leaf is often simmered in stews or stir-fries.
This cooking method unlocks a deep, savory flavor profile. Unlike their relatives, they do not form a head.
Instead, they produce large, nutrient-dense foliage perfect for home cooking. Their ability to survive temperatures as low as 15°F made them a standout in various climates.
Choosing the Best Varieties and Seeds
My journey into a successful harvest began with a simple choice: which type to plant. Selecting the right seeds is the crucial first step for healthy plants and a productive season.
Heirloom vs. Hybrid Options
You have two main paths: heirloom and hybrid seeds. Heirloom types, like ‘Georgia Southern’, are open-pollinated treasures. This classic has been grown since the 1880s and can reach six feet tall.
Hybrids, such as ‘Top Bunch 2.0’, are bred for specific traits. They offer uniform growth and lightly savoyed, tasty leaves.
| Variety Name | Type | Key Trait | Best For |
|---|---|---|---|
| Champion | Bolt-Resistant | Blue-green foliage | Spring & Fall gardens |
| Georgia Southern | Heirloom | Very tall growth | Traditional gardens |
| Top Bunch 2.0 | Hybrid | Attractive, savoyed leaves | Consistent table harvest |
| Morris Heading | Heirloom | Large, cabbage-like leaves | Big, broad foliage |
What I Look for in Collard Varieties
My primary focus is climate suitability. I choose a variety that withstands my region’s specific heat or cold. Bolt resistance, like in ‘Champion’, is a valuable feature for a longer harvest.
Leaf size and texture also matter for my kitchen. Choosing wisely at the start ensures my collard plants thrive from seedling to final pick.
How to Grow Collard Greens: Planting and Transplanting Essentials
Successful cultivation hinges on two primary methods: starting indoors or sowing directly outside. Each approach has its own timing and technique.
Mastering these planting essentials ensures your young seedlings develop into robust, productive specimens.
Starting Seeds Indoors for a Thriving Garden
I begin my spring crop by sowing seeds indoors. This gives them a safe, controlled start.
Place each seed about ¼ inch deep in starter trays. A consistent temperature near 75°F is ideal for germination.
For a timely harvest, I start this process 6 to 8 weeks before our last expected frost. This head start is crucial for strong development.
Proper soil moisture is critical during this phase. Never let the growing medium dry out completely.

Tips for Direct Seeding in the Garden
For direct sowing, I plant seeds ½ inch deep. I place them in small groups of three or four.
This grouping boosts the odds that at least one strong seedling will emerge from each spot. Once they sprout, thinning is necessary.
I never pull the extra seedlings. Instead, I snip them off at the base. This protects the delicate roots of the chosen plants.
Watch moisture levels closely, especially in summer. Intense heat can parch the ground and halt germination.
| Method | Best Time | Planting Depth | Key Advantage | Special Consideration |
|---|---|---|---|---|
| Indoor Start | Early Spring | ¼ inch | Controlled environment for strong seedlings | Requires trays and consistent warmth |
| Direct Seeding | Spring or Fall | ½ inch | No transplant shock; plants establish in place | Needs vigilant thinning and moisture control |
Preparing Your Garden: Soil, Sunlight, and Organic Matter
I learned early on that a plant’s success is deeply rooted in the quality of its environment. Getting the basics right from the start makes everything else easier.
How to Improve Soil Fertility
My priority is always the soil. I aim for a fertile, well-draining base with a pH between 6.0 and 7.0.
Adding plenty of compost achieves this perfectly. It enriches the earth and provides essential nutrients.
Mixing several inches of organic matter into my native garden dirt creates the ideal home for developing roots. If I’m unsure about quality, I test it with a kit from my local Cooperative Extension office.
Ideal Sunlight and Mulching Techniques
These plants need consistent light. I select a spot that receives at least 4 to 5 hours of full sun daily.
In cooler climates, providing 6 to 8 hours of full sun maximizes my total yield. The sun is their best friend for strong growth.
After planting, I apply a 3-inch layer of mulch around my young plants. This keeps the soil cool and moist while suppressing weeds effectively.
This simple preparation sets my entire garden up for a season of lush, healthy production.
Planting and Spacing for Optimal Growth
After preparing the soil, my next critical task is measuring out proper plant placement. Giving each one enough room is a fundamental rule for a healthy, productive plot.
Correct spacing prevents overcrowding and promotes good airflow. This simple step drastically reduces the risk of foliar diseases in your garden.
Calculating the Best Spacing in My Garden
For transplants, I space my plants 18 to 24 inches apart in the ground. This gives them the elbow room needed to reach their full size, sometimes up to six feet tall.
When I direct seed, I use a different approach. I place small groups of seeds about 15 inches apart. My rows are at least two feet apart for easy access and maintenance.
Whether using raised beds or in-ground rows, giving your collards this space is essential. It allows each plant to develop a strong, extensive root system.
This foundation supports an abundance of large, leafy harvests. I always take time to measure carefully. A little planning now ensures a successful season for all my garden plants.
Watering, Feeding, and Creating a Healthy Environment
The vitality of your leafy vegetables depends heavily on a simple routine of moisture and nutrients. After spacing your plants correctly, this daily care becomes your most important job.
It directly impacts the health of your crop and the quality of your final harvest.
Proper Watering Practices
I provide my plants with 1 to 1.5 inches of water each week. The goal is to keep the soil consistently moist, never soggy.
I always irrigate in the morning. This allows the leaves to dry fully before nightfall, which helps prevent common foliar diseases.
Checking moisture about six inches down after watering is a key step. It confirms the water is reaching the roots, not just the surface.
My Favorite Fertilizer and Feeding Schedule
For feeding, I use a water-soluble plant food or compost tea every three to four weeks. This supplies the nitrogen needed for lush, leafy growth.
My reliable choice is Miracle-Gro® Performance Organics® Edibles Plant Nutrition. I apply it throughout the active growing season.
This regular feeding, combined with consistent water, is the secret. It produces tender, high-quality greens with a superior, mild flavor.
Your plants will reward you with robust health and delicious greens for the table.
Managing Seasonal Temperatures: Planting in Spring and Fall
Planning around frost dates transformed my garden from good to exceptionally productive. My harvest’s success hinges on aligning with seasonal cycles, not fighting them.
Adjusting for Warm and Cool Climates
These plants are champions in the cold. They handle temperatures as low as 20°F. A light frost even makes their flavor richer and sweeter.
In warm climates, I plant in the fall. This lets crops mature during cooler weather, avoiding summer heat stress.
| Season | Planting Action | Key Advantage | Ideal For |
|---|---|---|---|
| Spring | Transplant 3-4 weeks before last frost | Gets an early start for a summer harvest | Gardeners wanting an early crop |
| Fall | Sow seeds in late summer for autumn growth | Leaves become sweeter after light frost | Maximizing flavor and extended harvest |
The table shows a clear choice. For the best-tasting greens, a fall garden is often my favorite. The cool temperatures of late season work magic.
If you live where frost is rare, you can transplant from fall straight through to spring. The secret is watching your local weather patterns.
Adjusting your schedule for your specific climates ensures a long, productive harvest window. It’s the best way to beat the heat and use the cold to your advantage.
Troubleshooting Pests and Disease Issues
A thriving garden requires vigilance against uninvited guests. I see pest and disease management as a regular, proactive part of my routine. Catching problems early makes all the difference.
Effective Strategies for Pest Prevention
My first line of defense is a simple physical barrier. Floating row covers provide an effective shield against aphids and cabbage worms. They let in light and water but keep pests out.
I make a habit of inspecting the undersides of leaves each week. If I spot a caterpillar, I handpick it or use an organic BT spray. Keeping the area clean of old plant debris also removes hiding spots for insects.
Identifying and Managing Common Diseases
For diseases, soil health is my focus. Clubroot is a serious issue for the cabbage family. I maintain a soil pH between 6.5 and 6.8 to discourage it.
Healthy, well-fed plants are naturally more resilient. This built-in strength helps them resist both pests and fungal problems. A little care prevents big headaches.
| Issue | Signs | My Action |
|---|---|---|
| Aphids | Tiny green insects on new growth | Blast with water or use insecticidal soap |
| Cabbage Worms | Holes in leaves, green caterpillars | Handpick or apply BT (Bacillus thuringiensis) |
| Clubroot | Wilting, swollen roots | Test and adjust soil pH; rotate crops |
| General Prevention | N/A | Use row covers, clean garden, inspect regularly |
This approach keeps my garden productive. Strong plants yield the best harvest.
Can Using the Best Fertilizer Improve How to Grow Collard Greens for Beginners?
Using the best fertilizer can significantly enhance your success in how to grow collard greens for beginners. Fertilizers enriched with the best nutrients for collard greens provide essential vitamins and minerals, promoting robust growth and vibrant leaves. This foundational step ensures a bountiful harvest right from the start.
Harvesting and Storing Your Collard Greens
The moment of gathering your leafy bounty is incredibly satisfying. This is the rewarding finale for all your careful tending. I love bringing fresh produce straight from my plot to the kitchen.

When and How to Harvest for Maximum Yield
You can start harvesting when leaves reach a 10-inch size. For tender, young greens, pick them anytime after they hit 5 inches.
Most plants reach full maturity in about 60 to 80 days from seed. Use the “cut-and-come-again” method for a long, continuous crop.
Take scissors or a knife and cut the lower leaves first. Work your way up the stalk. This keeps the center growing for your next harvest time.
Proper Storage and Recipe Ideas
Even after a hard winter freeze, you can harvest and cook leaves straight from the garden. Just ensure they are still intact.
Always wash your greens thoroughly before cooking. Soil often clings to the leaf undersides during the growing season.
Store your fresh crop in the refrigerator for several days. For a classic way to enjoy them, simmer with smoked meat. This traditional method brings out a deep, savory flavor perfect for cool winter meals.
Conclusion
The journey from seed to harvest with these resilient plants is filled with simple joys and delicious rewards. Cultivating collard greens provides a nutritious, cold-hardy crop for your home garden throughout the year.
By following the steps outlined, you can enjoy the unique flavor of fresh collard greens that actually sweeten after a light winter frost. These plants are remarkably easy to manage, making them ideal for any beginner looking to expand their vegetable garden.
Remember to provide consistent water and regular feeding. This keeps your plants healthy and productive for many months of harvesting tender greens. Whether you are planting in the spring or preparing for a fall harvest, these tips will help you achieve a successful result.
I hope this guide inspires you to start your own journey. Enjoy the many benefits of cultivating your own fresh greens, especially during the cool winter months when their flavor is at its best!