

Ethan Brooks
Focused on sustainable practices, careful seed selection, and hands-on experience, our family work closely with nature to produce quality harvests while continuously learning and improving each year..
Latest Posts


Archive
Tags
Social Links


There’s something truly special about cultivating your own food. Few experiences match the joy of watching corn stalks rise tall in your garden. This guide shares my journey and expert tips to help you succeed.
I started with Bonnie Plants® young corn plants, which gave me a strong, vigorous start. Their quality sets the stage for a big, rewarding harvest. You’ll find that growing corn transforms your space into a productive, beautiful area.
Whether you’re new to gardening or looking to improve, this guide walks you through each step. We’ll cover soil management and essential care techniques. Your goal is crisp, flavorful corn for your family to enjoy.
Key Takeaways
- Starting with quality young plants boosts your chances of success.
- Proper soil preparation is crucial for healthy corn growth.
- Consistent watering and sunlight help plants thrive.
- Timely harvesting ensures the best flavor and texture.
- Following expert tips makes the process easier and more rewarding.
Introduction to Growing Corn in My Backyard
Sweet corn, a true warm-season star, became the centerpiece of my home garden. This tender annual crop needs a long, frost-free growing season—typically 60 to 100 days—to produce full, sweet ears. Planning your planting calendar around this requirement is essential.
These plants belong to the Poaceae family, like grasses. They rely completely on wind for pollination, which is a fascinating process to observe. This means how you arrange your planting layout matters a great deal.
I learned quickly that corn is a hungry plant. Preparing your garden space early in the season with rich compost is vital for success. They are also sensitive to cold, so I never rush to put them in chilly ground.
For a strong start, remember these core needs:
- Warm soil: Patience at the start of the season pays off.
- Ample space and nutrients: They demand good food and room to breathe.
- Wind access: Planting in blocks helps pollination work its magic.
Watching these plants rise from the soil is one of the most satisfying parts of maintaining my yard. The journey from seed to towering stalk is incredibly rewarding.
Understanding Corn Varieties and Their Sugar Content
The world of sweet corn is divided by a sweet secret—its sugar content. This single factor shapes flavor, texture, and even how you plan your garden. Knowing the difference turns seed selection into an exciting choice.
Exploring Sweet Corn Types and Hybrids
Main varieties fall into two groups. Classic sugary (su) types have a sugar content between 8% and 18%. Modern supersweet (sh) types pack a much sweeter punch, with 40% to 50% sugar.
I frequently pick hybrid varieties. They combine the best traits for robust plants and outstanding flavor. Their consistent performance makes them a reliable choice for my plot.
Comparing Traditional and Supersweet Varieties
Traditional sugary corn is wonderful for its creamy texture. Its sweetness, however, converts to starch quickly after picking. You must enjoy these ears almost immediately for peak flavor.
Supersweets are famous for their intense sweetness and crisp bite. Their high sugar level holds for days. Remember, these types need isolation from other corn to keep their kernels from turning starchy.
Checking your seed packet labels is essential. This simple step ensures you get the texture and sugar content you desire for your table.
Preparing My Garden and Soil for Corn Planting
Getting the soil right is the first and most critical step I take each season. A strong foundation supports everything that follows. My garden beds need specific conditions for this crop to thrive.
Testing and Amending Soil pH
I always test my soil before planting. Sweet corn prefers a pH between 6.0 and 6.8. A simple test kit tells me if I need to adjust the acidity.
If the pH is too low, I add lime. If it’s too high, sulfur helps. This balance lets plants access all the nutrients they need.
Next, I mix in several inches of aged compost. This rich organic matter feeds my hungry plants. It also improves drainage in heavy clay or water retention in sandy spots.
Here’s a quick guide to common amendments I use:
| Amendment Type | Primary Benefit | Best For Soil Type | Application Timing |
|---|---|---|---|
| Aged Compost | Improves fertility & texture | All types, especially poor | Before planting |
| Well-Rotted Manure | Adds nutrients & organic matter | Heavy clay | Early spring |
| Peat Moss | Increases water retention | Sandy soil | During bed prep |
| Lime | Raises pH (if acidic) | Acidic soil ( | Several weeks before |
This preparation ensures my soil is fertile and well-drained. It sets the stage for rapid stalk and root development. Taking this time is the best investment for a big harvest.
Selecting the Right Corn Seeds for a Bountiful Harvest
Picking the perfect seed packet feels like selecting a promise for the future. This choice directly shapes your harvest’s size and flavor. I spend time each winter reviewing new varieties and trusted favorites.
High-quality seeds are the foundation for vigorous plants. They determine everything from stalk strength to kernel sweetness. Investing a little more upfront always pays off later.
Hybrid Versus Open-Pollinated Options
My personal preference leans strongly toward hybrid F1 seeds. They may cost a bit more, but their superior flavor and yield make them worth it. These varieties offer consistent performance and better disease resistance.
Open-pollinated or heirloom types have their fans. Gardeners appreciate their tradition and the ability to save seeds for next year. For my home garden, however, modern hybrids deliver more reliable results.
This table highlights the core differences:
| Seed Type | Key Advantage | Best For Gardeners Who | Primary Consideration |
|---|---|---|---|
| Hybrid (F1) | High yield & uniform ears | Want maximum sweetness & reliability | Cannot save seeds for replanting |
| Open-Pollinated | Seed saving & genetic diversity | Value tradition & self-sufficiency | May have lower disease resistance |
| Supersweet Hybrid | Exceptional sugar content | Prioritize long-lasting sweetness | Require isolation from other corn |
Factors to Consider for Healthy Plants
Always check the “days to maturity” on the packet. This number ensures the variety fits your local frost-free window. Matching this timeline is non-negotiable.
I also look for regional suitability notes. Some plants thrive in humid climates, while others prefer drier heat. This information guides me toward the best-performing corn for my area.
Starting with robust seeds sets your entire patch up for success. It leads to strong stalks and the finest ears you’ve ever tasted.
How to Grow Corn: Step-by-Step Planting Strategies
A successful corn harvest begins with precise planting techniques that I’ve refined over seasons. My method ensures each seed gets the best start for strong stalks and full ears.
My strategy always starts with soil warmth. This crop is very sensitive to cold. I wait until the ground reaches at least 60°F before I begin.
I sow each kernel about 1.5 to 2 inches deep. Correct spacing gives every plant room for its root system to develop fully. Crowding leads to weak stalks.
Sometimes I start my seed indoors in 4-inch pots. This gives them a head start. I harden off the young plants for a full week before moving them outside.
To speed up germination, I use a simple trick. I moisten the kernels and wrap them in a damp paper towel inside a plastic bag for 24 hours before sowing. This wakes them up.
I always water the area thoroughly right after planting. This helps the kernel settle and begin its growth. A consistent schedule is my secret for a productive, healthy season.
Optimizing Planting Layout and Spacing
Optimizing spacing isn’t just about aesthetics; it’s about giving each stalk the resources it needs. The right arrangement ensures strong plants and a full harvest.
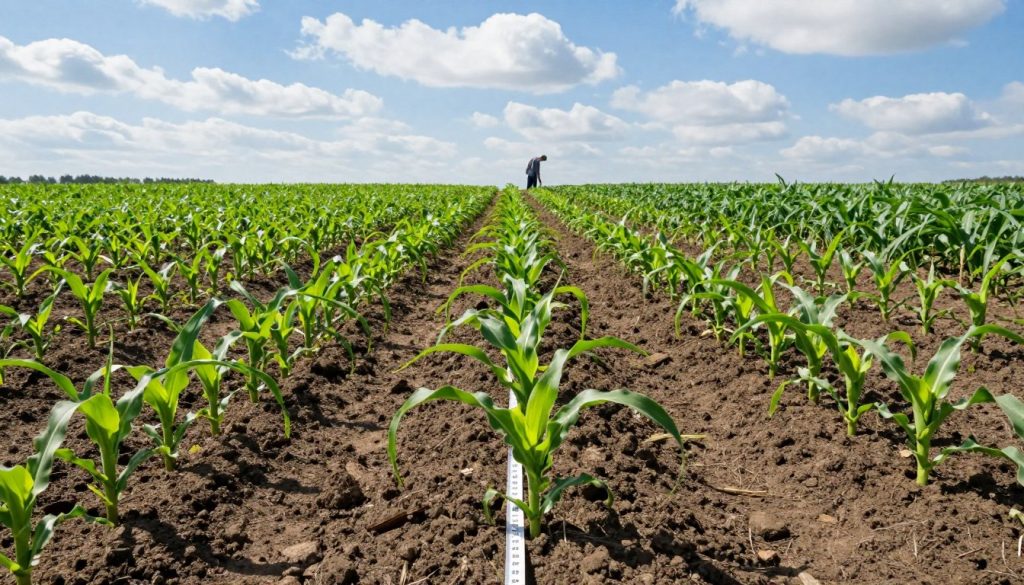
Determining the Ideal Inches Apart
I space my seedlings 8 to 12 inches apart. This gives each one enough room to access sunlight and soil nutrients. Crowding creates competition and weak stalks.
Even in a small plot, you can achieve a good yield. For example, a 3 x 5-foot bed can hold about 15 plants. Just set them one foot apart in a block layout.
Block Planting Versus Single Row Methods
I always use a block of at least four rows. A single long row often fails because wind cannot move pollen effectively. Planting in blocks lets the breeze work its magic from all directions.
This method is essential for pollination. Wind carries pollen from the tassels to the silks on every ear.
I keep my rows about 2.5 to 3 feet apart. This spacing makes garden maintenance and future harvesting much simpler. You can walk between the plants without damaging them.
A thoughtful layout is a cornerstone of success. It supports healthy corn and leads to perfectly filled ears.
Watering and Fertilizing for Rapid Corn Growth
The secret to tall, vigorous corn stalks lies in a consistent regimen of moisture and nutrients. I treat these hungry plants like champions, providing exactly what they need when they need it.
Effective Irrigation Practices
I aim for about one inch of water every week. A soaker hose is my favorite tool. It delivers moisture directly to the soil without wetting the leaves.
During hot, dry spells, I always check soil moisture with a trowel. This ensures the roots are getting enough water. Consistent moisture is key for rapid development.
Selecting the Best Fertilizers and Compost
I feed my corn with a balanced 10-10-10 fertilizer or a high-quality water-soluble plant food. Regular feeding supports their intense hunger for nutrients.
If leaves turn a light green color, I know the plants are hungry. An immediate side-dressing of nitrogen-rich fertilizer fixes this. Adding a three-inch layer of mulch helps too.
This mulch retains precious moisture and prevents weeds. I sometimes mix in aged compost for an extra boost. It keeps my plants strong all week long.
Managing Weather and Seasonal Conditions
Weather patterns directly influence the success of my backyard crop. I treat each season as a unique chapter in my garden’s story. Planning for the elements ensures my plants thrive from spring to fall.
Planting After the Last Frost in Spring
I always wait for the final frost in spring. These plants are tender and cold can stunt them. For a shorter season, I lay black plastic to warm the earth a week early.
A surprise late chill still happens sometimes. My quick fix is a fabric row cover over the young stalks. This shield keeps them safe until the weather settles.
Protecting Corn from Extreme Weather
Hot, dry spells demand more water. I increase irrigation so the crop never gets stressed. Consistent moisture keeps growth active.
Strong winds are another challenge. I mound soil around 12-inch-tall plants for stability. This simple step prevents them from toppling during summer storms.
Guarding against extreme weather is a key part of my strategy. It helps every stalk reach its full potential by harvest time.
Understanding Corn Pollination and Wind Requirements
The magic of a full ear hinges on a delicate, wind-driven dance. This natural process is fascinating to watch in my garden. Successful pollination is the key to every plump kernel.
It all starts with the tassels at the top of each stalk. These structures release a fine, yellow dust. That dust is the vital pollen needed for the crop.
The Role of Tassels and Silks
The female silks emerge from each developing ear. Each delicate strand connects directly to a future kernel. For a complete harvest, pollen must land on every single silk.
This task relies completely on the wind. I always plant my plants in tight blocks, not single rows. This layout gives the breeze the best chance to shower pollen down onto the waiting strands.
Sometimes, I notice ears with missing kernels. This inconsistent development is a clear sign. The silks were not fully pollinated during their brief flowering stage.
My favorite trick is a gentle morning shake of the stalks. This helps the tassels release their pollen. It’s a simple, hands-on way to support nature’s wind and ensure a perfect, full ear of corn.
Pest and Disease Control for Healthy Corn Crops
Protecting my corn from pests and diseases is a continuous part of my gardening routine. A strong defense keeps my crop healthy and productive all season long.
I stay vigilant from the moment the stalks appear. Early action prevents small problems from becoming big losses.
Identifying Common Corn Pests and Remedies
I keep a close watch for insects like corn earworms. Tight husks or light row covers help shield the developing ears.
Raccoons are a major challenge in my garden. I rely on a physical barrier to keep them from eating my ears.
My electric fence uses two strands of wire. One sits at 4 inches and another at 12 inches from the ground.
This table shows the pests I encounter most often and how I handle them.
| Pest | Typical Signs | My Recommended Remedy |
|---|---|---|
| Corn Earworm | Chewed silks & kernels | Apply Bt spray or use row covers |
| Raccoon | Broken stalks, missing ears | Install a two-strand electric fence |
| Aphids | Clusters on leaves, sticky residue | Blast with water or use insecticidal soap |
| Cutworms | Seedlings cut at base | Use cardboard collars around young plants |
Preventative Measures Against Diseases
Fungal issues like leaf rust or smut require quick action. I immediately remove any infected plant parts to stop spore spread.
Overhead watering can encourage these diseases. I always water at the soil level to keep leaves and stalks dry.
Good garden hygiene and rotating my crops each year are my best strategies. They significantly reduce risk for my plants.
For a comprehensive guide on protecting your crop, explore effective corn pests and diseases management solutions.
Harvesting Corn at Peak Sweetness
Harvest time arrives when the ears signal they are ready with unmistakable signs. This moment is the culmination of a season’s work, and timing is everything for that perfect sweetness. I watch closely for the right cues to ensure my corn is at its best.
Recognizing When Corn Is Milky and Ready
I know my corn is ready when the silks turn completely brown and dry. The real test is piercing a kernel. If it releases a milky, opaque sap, the ear is perfectly ripe. This stage typically happens 18 to 24 days after the silks first appear.
In hot weather above 85°F, this peak window shrinks to just a few days. I check my plants every morning. If the liquid from the kernel is clear, the ear needs more time. A thick, creamy liquid means it’s past prime and turning starchy.
Best Practices for a Clean Harvest
To pick an ear, I firmly hold the stalk with one hand. With the other, I grasp the ear and pull downward with a sharp twist. This motion gives a clean break from the stalk without damaging the plants.
I always aim to harvest in the cool morning hours. The ears retain more of their sugary flavor then. Getting them inside quickly locks in that just-picked sweetness for my family to enjoy.
Storing and Preserving Freshly Harvested Corn
Preserving the peak flavor of my harvest requires swift and proper storage techniques. My first move is always to the refrigerator. I place the ears inside immediately after picking them from the stalk.
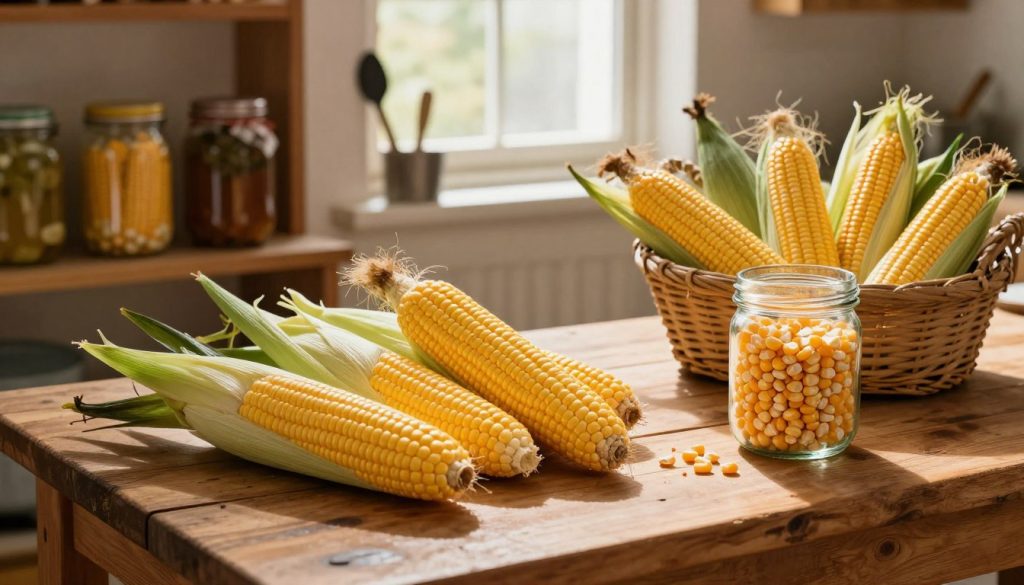
This cool environment helps lock in that precious sweetness. It keeps my corn fresh and delicious for about a week. For the very best experience, I enjoy it as soon as possible.
Nothing beats the flavor of an ear cooked within hours of picking. Sometimes, my bounty is larger than we can eat right away. That’s when I turn to freezing for long-term preservation.
I prefer to remove the kernels from the cob first. I blanch them briefly in boiling water, then plunge them into an ice bath. After drying, the kernels go into airtight freezer bags.
This method captures the garden-fresh taste perfectly. Speed is essential throughout this process. I always prepare my corn for preservation right after the harvest.
Waiting allows the sugars to convert to starch, dulling the flavor. My plants worked hard all season. Proper storage ensures their effort translates into delicious meals for months to come.
It’s the satisfying final chapter in my garden’s story. Each frozen kernel is a reminder of my thriving plants and a promise of future feasts.
Troubleshooting Common Corn Growing Challenges
Every season in my garden brings a few puzzles to solve, and this crop is no exception. I see each issue as a chance to learn and improve my methods for next year. Most problems have straightforward solutions.
Dealing with Inconsistent Kernel Development
Gaps in my ears signal poor pollination. This happens when pollen misses the silks. My fix is simple: I plant in larger blocks next time. This gives the wind a better chance to do its job.
I always isolate different types by at least 250 feet. This prevents cross-pollination. Without isolation, sweet kernels can turn starchy and tough.
Storms sometimes knock my plants over. I leave them alone. They usually right themselves after a few sunny days. Staking is rarely needed.
Yellowing leaves warn me of hunger. I check my garden regularly. A quick side-dressing with nitrogen-rich fertilizer greens them up fast.
Troubleshooting is a normal part of the process. Better planning and consistent care solve most challenges. My plants reward this attention with full, delicious ears.
Can Tips for Growing Cotton at Home Also Apply to Growing Corn Successfully?
While the specific needs of corn differ from cotton, many tips for growing cotton at home can enhance corn cultivation. Both crops thrive in well-drained soil, benefit from adequate sunlight, and require careful watering. Adapting these principles can lead to a flourishing corn crop alongside your cotton plants.
Integrating Companion Planting and Garden Techniques
My garden truly comes alive when I weave ancient wisdom into modern planting beds. Native Americans perfected the Three Sisters method, pairing corn with beans and squash. This creates a mutually beneficial system that I love using today.
Pairing Corn with Beans and Squash
This partnership forms a productive, sustainable ecosystem. The tall corn stalks become a natural trellis for climbing beans. Meanwhile, sprawling squash leaves shade the soil, keeping roots cool and moist.
I find this technique maximizes my garden space beautifully. All three plants support each other throughout the season. It’s a wonderful way to boost overall health and yield.
Key benefits I’ve experienced include:
- Natural support: Beans climb corn stalks without extra structures.
- Weed suppression: Squash leaves act as living mulch.
- Improved soil: Beans fix nitrogen, feeding neighboring plants.
- Resilient ecosystem: The trio resists pests and weather stress better.
Integrating these traditional techniques makes my backyard more resilient. It significantly increases the variety of vegetables I harvest. My corn thrives as part of this supportive community.
Conclusion
Seeing your efforts culminate in a basket of fresh ears is an unmatched satisfaction. Growing corn in your own backyard connects you deeply with the natural cycle. It transforms your garden into a source of food and joy.
Applying the expert tips shared here helps manage soil, planting, and pollination successfully. This leads toward a bountiful harvest of sweet, delicious ears. Your plants thrive with proper care.
Consistency remains key throughout the season. Provide enough water, protect your plants from pests, and ensure ample space. This guide builds your confidence for starting your own patch.
Whether planting a small block or a larger garden, your plants reward your effort with every flavorful bite from your corn.