

Ethan Brooks
Focused on sustainable practices, careful seed selection, and hands-on experience, our family work closely with nature to produce quality harvests while continuously learning and improving each year..
Latest Posts


Archive
Tags
Social Links
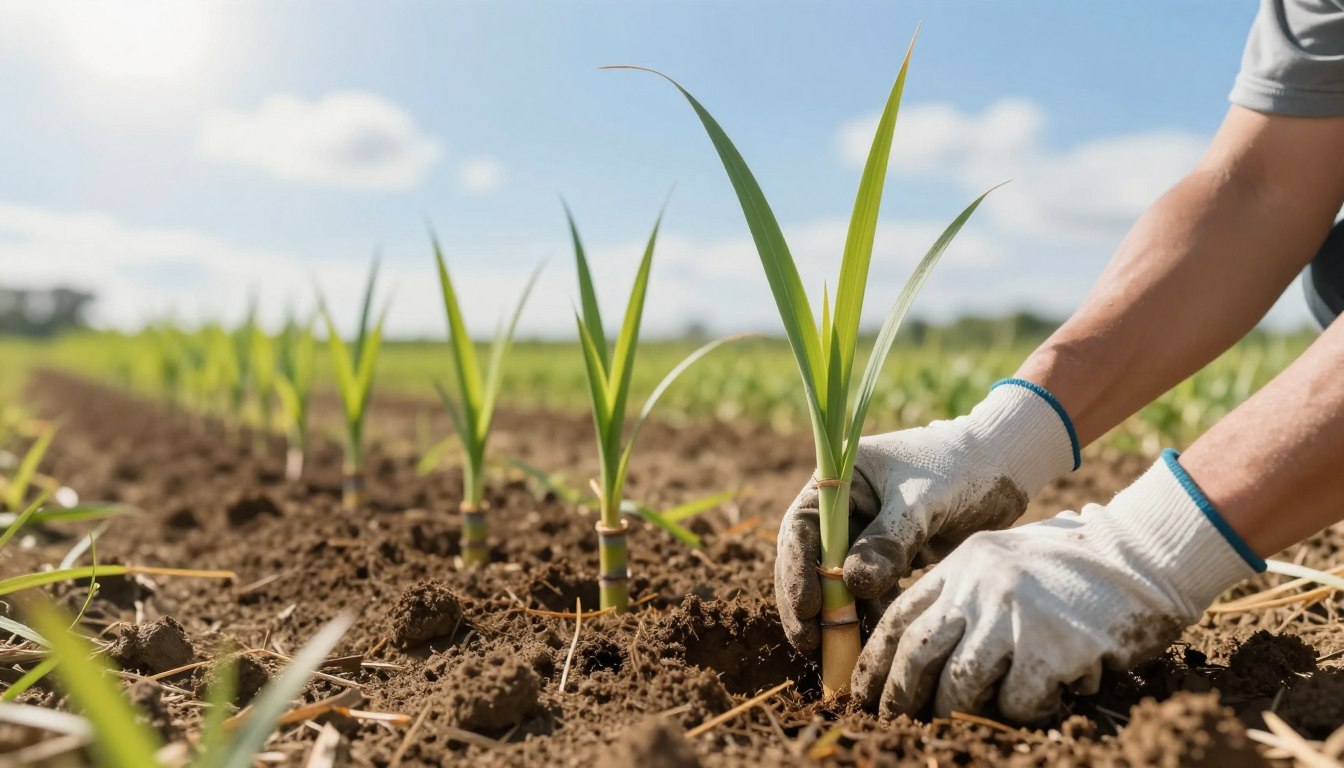

Ever wanted to grow your own sweet, crunchy stalks right in your backyard? Learning how to plant sugar cane is a rewarding project, and I’m here to guide you through it. You can enjoy a homegrown harvest, even if you live in the United States.
Sugar cane is a tall, perennial grass. Its stalks range in color from vibrant green to deep red or purple. This crop loves warm weather and is best suited for tropical places like Brazil or India.
Don’t let that stop you! With the right preparation, you can succeed. The process is unique because you don’t use seeds. You start with pieces of mature stalk, called cuttings. My guide covers everything from soil to harvest. I’ll show you how to manage space for these thick plants and protect them from cold snaps.
Key Takeaways
- Sugar cane is a perennial grass grown from stalk cuttings, not from seed.
- It thrives in warm, tropical and subtropical climates but can be adapted.
- Selecting healthy, mature stalks is the first critical step for success.
- Proper soil preparation and spacing are essential due to the plant’s large size.
- Protecting your crop from frost is key to maintaining high sugar content.
- This guide provides a complete, beginner-friendly process from planting to harvest.
- Growing your own can be a fun and productive garden project.
Understanding Sugar Cane Growing Conditions
Your crop’s success hinges on replicating its native tropical habitat as closely as possible. This perennial grass demands specific weather and ground conditions to produce those sweet stalks we love. I always check my local climate first.
Temperature and Sunlight Requirements
This crop thrives in intense heat and light. It grows best in USDA zones 9 through 11.
The ideal temperature is around 90°F (32°C). Freezing weather will damage or kill it. Provide at least eight hours of direct sun daily.
Shaded areas stunt growth. Humidity should stay above 50% to keep the grass from drying out.
Soil Quality and Moisture Essentials
The right ground conditions are just as critical. This grass needs soil with excellent drainage and aeration. A pH between 5 and 8.5 works well.
Water is a big factor. Over a growing season, it requires 1500 to 2500 mm of precipitation. That’s about 25-50 mm each week.
If natural rainfall is low, an irrigation system is a must.
| Factor | Optimal Range | Importance |
|---|---|---|
| pH Level | 5.0 – 8.5 | Affects nutrient availability |
| Drainage | Well-drained | Prevents root rot |
| Aeration | Good | Allows roots to breathe |
| Texture | Loamy | Holds moisture but drains well |
Choose a field with a favorable microclimate. This plant is sensitive to salt and water stress.
Preparing Your Garden and Soil
Success in cultivation is often determined by the quality of preparation done before the first stalk is placed. I always start by giving the earth my full attention. This groundwork sets the stage for everything that follows.
You should thoroughly till the ground in your chosen plot. This process ensures the root system can expand without resistance. Aim for moist, well-aerated earth that is at least one meter deep.
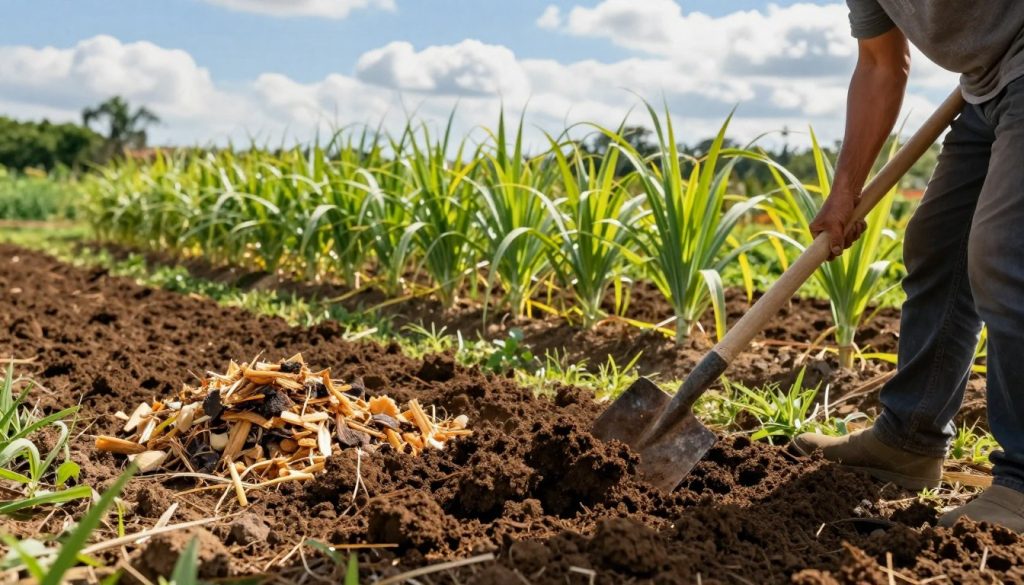
Before any work begins, consider using the EOSDA Crop Monitoring platform. It helps assess historical temperature and precipitation data for your specific field. This insight is invaluable. Next, clear all debris and weeds from the area. A clean environment gives your new cuttings the best start.
If your ground is highly acidic or sandy, amending it is crucial. The preferred pH range is between 6 and 6.5. I also recommend a sunny location away from high-traffic areas. The sharp leaves of mature cane stalks can cause injury.
Proper soil preparation allows plants to establish themselves quickly. This strong foundation is vital for surviving winter stress. You can also use this time to plan your irrigation strategy. The goal is to keep the earth consistently moist, but never saturated. For more expert tips, check out this comprehensive guide on cultivation.
How to Plant Sugar Cane: Essential Techniques
Unlike many crops, sugar cane doesn’t grow from traditional seeds. You propagate it using pieces of mature stalk, called seed-cane. This is because the plant will not breed true from actual seeds.
Using Cuttings for Propagation
Select healthy, mature stalks. Cut them into sections containing five to six buds. These buds are the growing points located at the nodes.
Always disinfect your tools first. This prevents the spread of diseases to your new crop. It does not matter if you place the pieces horizontally or vertically. The shoots will naturally find the surface.
Choosing the Right Planting Method
You have three main options: flat, furrow, or trench. The trench method is very efficient. It allows nearly 80% of cuttings to sprout.
For the flat method, open shallow furrows 8-10 cm deep. Space them 75-90 cm apart. With the furrow method, dig trenches 10 to 20 cm deep. This depends on your soil type.
When placing cuttings in the furrows, let them overlap. The end of one piece should reach the middle of the next. This ensures good coverage.
Step-by-Step Planting Process
Getting your cuttings ready and into the ground correctly is the most hands-on part of the journey. This is where your preparation pays off and your future crop begins.

Cutting and Preparing Sugar Cane Pieces
Start with healthy, mature stalks. Use a clean, disinfected knife to cut them into sections. Each piece should have five or six buds.
Handle these stalk pieces with care. The buds are resilient, but you should avoid damaging them. If you are starting in winter, the cuttings will simply wait. They enter a dormant state until spring warmth arrives.
Planting Orientation and Spacing Guidelines
Place your cuttings into the prepared furrows. Let them overlap slightly for good coverage. Next, cover them with four to six inches of soil. This layer protects the developing buds.
I suggest spacing your rows four to ten feet apart. This gives the plants ample room to reach maturity. Keep the earth consistently moist for the first few weeks. Be careful not to drown the new cuttings.
Monitor your field closely. The first signs of green shoots are a thrilling sight. They signal successful germination. This establishment stage typically lasts 10 to 30 days.
Once shoots emerge, you can build up the furrows with more soil. This encourages strong root growth.
| Stage | Key Action | Timeline | Pro Tip |
|---|---|---|---|
| Preparation | Cut stalks, disinfect tools | Day 1 | Overlap cuttings in the furrow |
| Planting | Cover with 4-6″ soil | Day 1 | Keep soil moist, not soggy |
| Establishment | Monitor for green shoots | Days 10-30 | Space rows widely for future growth |
| Early Growth | Hill up soil around shoots | After emergence | This supports deeper roots |
Caring for Your Sugar Cane Crop
Nurturing your crop after planting is just as important as the initial setup. Your focus now shifts to providing consistent water, the right food, and keeping competing plants at bay. This daily attention is what transforms young shoots into thick, sweet stalks.
Watering and Fertilization Tips
Your plants crave consistent moisture. I provide about 1-2 inches of water weekly if rain is scarce. Slow growth often signals a need for more irrigation.
For feeding, a nitrogen-rich fertilizer works wonders. I stop all applications after mid-July. This prevents delayed maturity and ensures energy goes into sugar production.
Tools like Variable Rate Application (VRA) help distribute nutrients evenly. Always watch for yellowing leaves. They are a clear sign to adjust your fertilization schedule.
Effective Weed Management
Weed control is critical in the early stages. I prefer manual weeding over chemicals. Young shoots are easily choked out by competition.
Thankfully, this task gets easier. Mature stalks create a dense canopy that shades the ground. This natural suppression cuts down on weed management work later.
My rule is simple: keep the area clean until the stalks are tall and strong enough to defend themselves. This protects your crop’s growth and resources.
Pest, Disease, and Winter Protection Strategies
Keeping your sweet grass healthy requires smart protection strategies. I focus on prevention first. This saves time and protects your harvest.
Preventive Measures Against Pests and Diseases
Sugar cane borers top my watch list. They can slash sweetness by 45% in affected plants. Rodents and rabbits also threaten young stalks.
I install wire fences around my field. This simple barrier keeps hungry animals out. For soil-dwelling pests like wireworms, flooding works well.
Fungal diseases spread through dirty tools. I disinfect everything between uses. The EOSDA Crop Monitoring platform helps spot trouble early.
It tracks 15 common issues, including mosaic disease. Remove infected plants immediately. This stops problems from spreading.
Winter demands special care. I cover roots with straw or leaves. This insulation prevents frost damage and ensures spring growth.
Choosing resistant varieties is my best tip. It makes managing these measures much easier.
Harvesting Techniques and Post-Harvest Processing
When autumn arrives, it’s time to gather the sweet rewards of your labor from the field. After about twelve months of growth, your tall grasses reach peak maturity. I always harvest before the first frost to protect my investment.
Using a sharp machete works best for me. Cut each mature stalk as low as possible without harming the roots. The base contains the highest concentration of sweetness, so cutting close maximizes your yield.
Once harvested, I strip away the sharp leaves. These make excellent organic mulch for protecting roots during winter. The EOSDA Crop Monitoring platform helps me determine the perfect harvest window using its NDRE index.
Your harvested canes offer multiple options. Crush them for fresh juice or chop into pieces for chewing. In colder regions, complete your harvest by September’s end to avoid frost damage.
The amazing thing about these plants is their regrowth ability. The roots will produce another crop next spring, providing harvests for several years. This perennial nature makes the initial effort truly worthwhile.
Is the Planting Process for Sugar Cane Similar to Growing Paprika?
The planting process for sugar cane differs significantly from growing vibrant paprika in home gardens. Sugar cane thrives in warm climates and requires tall space for growth, while paprika prefers well-draining soil and moderate temperatures. Understanding these differences ensures successful cultivation and optimal harvest for both plants.
Utilizing Modern Technology for Successful Crop Management
Satellite imagery gives me a bird’s-eye view of my entire growing operation. This technology helps me spot problems before they become serious issues.
Satellite Monitoring and Data-Driven Decisions
I use EOSDA Crop Monitoring for high-resolution images of my fields. This tool helps me identify trouble spots with uneven growth.
The Productivity Maps feature shows me how different practices affect my total yield. I can track all my field activities in one place.
Optimizing Irrigation and Fertilizer Applications
The NDMI index helps me assess water needs dynamically. I adjust irrigation based on real-time data from my plants.
This approach ensures nutrients reach my crop at the right time. I save both time and resources while improving production.
| Traditional Approach | Tech-Enabled Method | Benefit |
|---|---|---|
| Manual field inspection | Satellite monitoring | Saves time, covers larger area |
| Fixed watering schedule | Dynamic irrigation | Optimizes water content |
| Uniform fertilization | Precision application | Boosts growth and production |
| Visual crop assessment | Data-driven decisions | Improves overall yield |
These modern tools help me manage my fields more efficiently. They contribute to sustainable farming practices while maximizing my crop’s potential.
Conclusion
Embarking on the journey of cultivating your own sweet grass brings immense satisfaction from garden to table. Growing this crop is a truly rewarding experience that yields a fresh, natural treat.
By adhering to each step outlined, you give your plants the care they need to thrive. Selecting the ideal area and monitoring progress throughout the season are crucial for high sugar content.
Whether you choose the trench or furrow approach, consistent watering and weeding deliver the best outcomes. Your dedication during this time ensures a robust and productive harvest.
I hope this guide builds your confidence in managing the entire cycle. With patience and proper technique, you’ll enjoy producing your own sugar cane for years to come.