

Ethan Brooks
Focused on sustainable practices, careful seed selection, and hands-on experience, our family work closely with nature to produce quality harvests while continuously learning and improving each year..
Latest Posts


Archive
Tags
Social Links


Welcome to the enchanting world of poppies, those delicate blooms that can transform any garden into a vibrant paradise. These flowers are not just beautiful; they are also loved by pollinators, making them a delightful addition to your outdoor space. I believe everyone should try cultivating these lovely plants at least once.
Imagine waking up to the sight of poppies unfurling in the morning light, with honeybees buzzing around them. It’s a magical experience that truly brightens your day. However, it’s essential to understand that while growing poppies can be rewarding, it does come with its challenges.
In this guide, I will share my personal journey and insights on successfully nurturing these flowers. From selecting the right types to harvesting at the perfect moment, you’ll discover everything you need to know to enjoy the beauty of poppies in your garden.
Understanding Different Types of Poppy Seeds
Explore the captivating world of different poppy types that can enhance your landscape. Poppies are divided into four main categories, each offering unique characteristics that cater to various gardening goals. Whether you desire cut flowers, striking seed pods, or landscape beauty, there’s a perfect poppy for you.
Annual vs Perennial Poppies
First, let’s differentiate between annual and perennial poppies. Annual poppies, like Shirley Poppies (Papaver rhoeas), also called Field Poppy or Corn Poppy, are easy to cultivate but have a short lifespan. They typically last only 2-3 days, with a realistic expectation of just one day.
On the other hand, perennial types, such as Oriental Poppies (Papaver orientale), can bloom year after year. While they may not flower until their second growing season, once established, they can provide beauty for decades.
Popular Varieties for US Gardens
Now, let’s delve into some popular varieties that thrive in US gardens:
| Type | Scientific Name | Characteristics | Bloom Duration |
|---|---|---|---|
| Shirley Poppies | Papaver rhoeas | Easy to grow, bright colors | 1-3 days |
| Breadseed Poppies | Papaver somniferum | Interesting seed pods, not for cut flowers | 1-3 days |
| Oriental Poppies | Papaver orientale | Popular for landscapes, unique pods | Years once established |
| Iceland Poppies | Papaver nudicaule | Best for cut flowers, temperamental | Up to 5 days |
For beginners, I recommend starting with Shirley Poppies and Breadseed Poppies. They are less temperamental and provide a rewarding experience. If you are looking for cut flowers, Iceland Poppies are ideal, offering a vase life of up to five days when harvested correctly.
As you plan your garden, remember that annual poppies can reseed themselves. This means you can enjoy their beauty year after year without the need for replanting.
Preparing to Grow: Choosing the Right Location and Soil
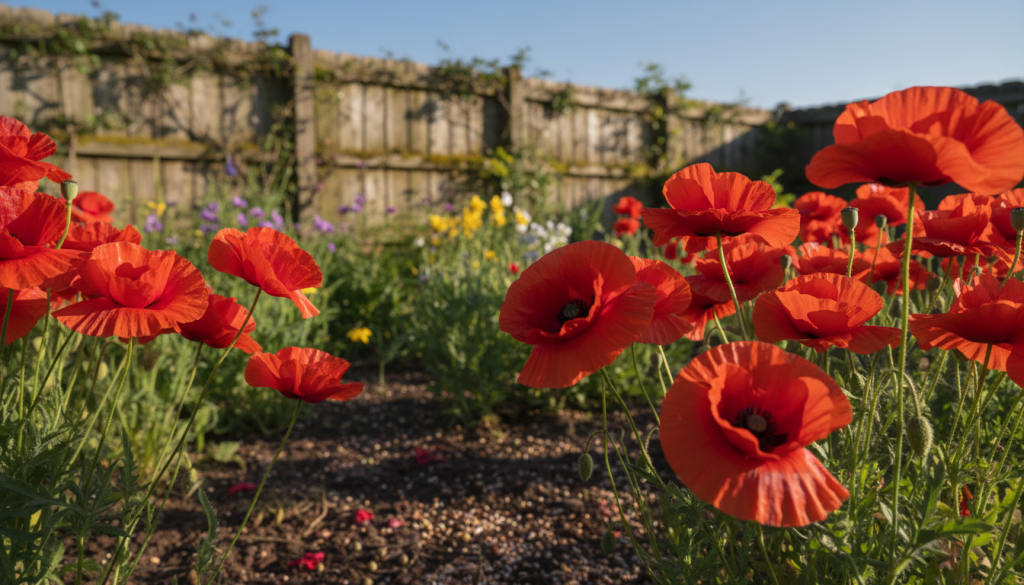
Choosing the right conditions for your flowers can lead to a stunning display. Poppies thrive in full sun, requiring at least six hours of bright, direct sunlight each day. When selecting a spot in your garden, look for the sunniest area available.
Well-drained soil is crucial for these delicate blooms. Poppies absolutely hate having wet feet and will struggle in constantly damp conditions. If your garden has heavy, compacted soil, consider creating a raised bed or berm to improve drainage.
Before planting, it’s essential to prepare your existing flower bed. Rake the area thoroughly to break up small lumps, and remove any large stones that could hinder tiny seeds. For areas with high clay content, mix in at least two inches of compost to enhance drainage.
Most poppy species prefer slightly dry, well-drained soil. They are quite resilient and can even survive in relatively poor conditions. Interestingly, too-rich soil can work against you, as poppies don’t require heavy fertilization. In fact, a light application once a year is often sufficient.
When preparing your planting area, remember that poppies need a location where they can settle in for the long haul, especially the perennial varieties that return year after year. I usually prepare my area in the fall or early spring, depending on my growing zone, to give my poppies the best possible start.
| Condition | Requirement |
|---|---|
| Sunlight | At least 6 hours of bright, direct sunlight |
| Soil Type | Slightly dry, well-drained soil |
| Drainage | Excellent; avoid wet conditions |
| Fertilization | Light application once a year |
| Preparation | Rake and amend soil as needed |
How to Grow Poppy Seeds Plant: Sowing and Planting Techniques
Let’s dive into the exciting process of sowing and planting these delightful blooms. Understanding the best techniques can make a significant difference in your gardening experience. While poppies prefer direct sowing, they can also be grown as transplants with some care.
When opting for transplants, remember that bottom watering is essential. Set your tray in a pan of water, allowing the soil to absorb moisture from below. Overhead watering can wash away those tiny seeds, which can be frustrating. If you must start seeds in trays, I recommend using the clever toothpick method. Simply pour seeds into a bowl, lick a toothpick, and dip it into the seeds to transfer them one by one to prepared cells.
Direct Sowing vs Transplanting
Direct sowing is my go-to method for growing these flowers. Poppies really dislike being transplanted and prefer to stay put where they germinate. If you live in Zone 6 or warmer, prepare your growing area in the fall. This way, the seeds can lay dormant over winter and burst into life in early spring.
For those in Zone 5 or colder, sprinkle seeds directly onto thawed soil in March. Poppy seeds can handle frost and even a light snow, making them quite resilient. It’s crucial to remember that these seeds need light to germinate. Avoid burying them; just press them gently into the surface.
Seed Sowing Tips and the S.T.U.N. Method
One of my favorite philosophies for growing poppies is the S.T.U.N. method, which stands for “Sheer, Total, Utter Neglect.” Surprisingly, these flowers seem to thrive when you stop fussing over them. Toss the seeds in the air out of frustration, and they may take off like crazy!
When direct seeding, consider mixing one part poppy seeds with four or five parts dry sand. This helps distribute the seeds evenly across your planting area. If you’re planting seeds in late spring, give them a month of cold stratification in the refrigerator. This mimics winter and significantly improves germination rates.
Lastly, for transplanted seedlings, always bottom water. This method prevents the delicate seeds from being washed away, ensuring a successful start for your poppy plants.
| Technique | Description |
|---|---|
| Direct Sowing | Sprinkle seeds directly in the garden; ideal for poppies. |
| Transplanting | Start seeds in trays and use bottom watering to prevent washing away. |
| Toothpick Method | Transfer seeds using a moist toothpick for precision. |
| S.T.U.N. Method | Let nature take its course; minimal intervention often yields the best results. |
| Cold Stratification | Refrigerate seeds for a month before planting in late spring. |
Proper Spacing and Planting Depth
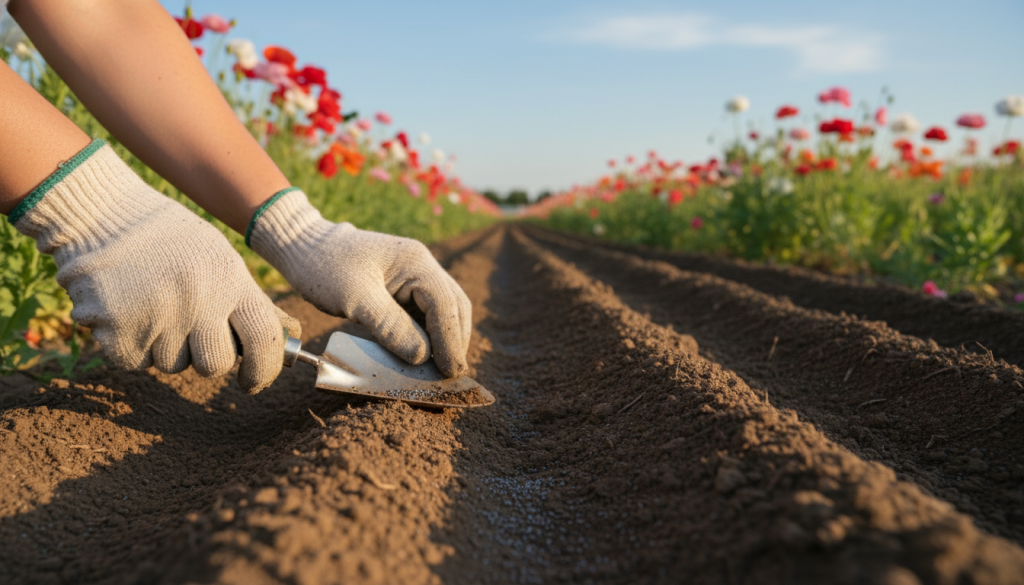
When it comes to cultivating poppies, spacing and planting depth play a vital role in their success. I’ve discovered that these beautiful blooms can thrive at a distance of just 6 inches apart or even less. In my experience, I rarely find the need to thin them out, as they don’t seem to mind crowded conditions.
Sprinkling seeds over your chosen area can feel like tossing fairy dust, and while precise spacing may not always happen, the results can still be stunning. It’s important to remember that poppy seeds require light to germinate, so avoid burying them in the soil. Instead, after you sprinkle the seeds, gently press them down with your hand to ensure good seed-to-soil contact.
Once you’ve pressed the seeds into place, it’s essential to water the area well. Keeping the soil moist but never soggy is crucial during the germination phase. If you find yourself with clumps of seeds and bare spots, don’t worry! Thinning these clusters can help reduce competition and give your plants room to grow.
Here are some guidelines to consider when thinning:
- Wait until your plants reach about 2 inches (5 cm) tall before you thin them out.
- Space them roughly 10 to 12 inches (25–30 cm) apart for optimal growth.
In my garden, I’ve embraced the natural, slightly wild look that comes from letting poppies grow where they land. It’s all part of the charm of these lovely flowers. Remember, your goal is to create an inviting garden area where these blooms can flourish.
For more detailed tips on planting poppy seeds, check out this informative guide on how to grow poppies from seed.
Growing and Caring for Your Poppy Plants
Caring for your poppy plants is essential for a thriving garden. These vibrant flowers need specific attention to ensure they bloom beautifully throughout the growing season. Let’s explore the key aspects of their care, focusing on watering, sunlight, and deadheading.
Watering and Sunlight Requirements
Poppies thrive in bright conditions, requiring at least 6 hours of direct sunlight each day. This is one of the most important decisions you can make for their care. Choosing a sunny spot will significantly enhance their growth and bloom potential.
When it comes to watering, I follow a simple philosophy: let the top inch of soil dry out between waterings. Poppies prefer drier conditions and do not appreciate constantly wet or poorly drained sites. Water only when the top 1 cm of soil feels dry to the touch. This method helps prevent root rot and keeps your plants healthy.
Deadheading and Encouraging Continued Blooming
Deadheading spent blooms—snipping off faded flowers—encourages your plants to produce new blooms well into the growing season. In my experience, poppies bloom prolifically until mid-July, when the heat begins to slow them down. You can choose to deadhead for more flowers or leave some blooms to form seed pods for next year’s garden.
For Oriental Poppies, the foliage will die back in summer. I like to interplant them with other flowers to avoid bare spots in my garden. Harvesting stems for cut flowers signals the plant to produce even more blooms, creating a win-win situation.
Thinking long-term is essential. Plant your poppies in a permanent spot where they can reseed and return year after year without disturbance. Leaving seed pods on the plants through winter not only creates visual interest but also provides food for birds.
| Care Aspect | Recommendation |
|---|---|
| Watering | Let the top inch of soil dry out between waterings. |
| Sunlight | At least 6 hours of direct sunlight each day. |
| Deadheading | Remove faded flowers to encourage new blooms. |
| Planting Location | Choose a permanent spot for annuals and perennials. |
| Seed Pods | Leave some blooms to develop seed pods for next year. |
Harvesting Poppy Flowers and Seed Pods
Harvesting poppies is a rewarding experience, but timing is crucial. The best time to collect these beautiful blooms is at the “cracked bud” stage. This is when you can see the color of the flower just beginning to peek through its casing. If you wait too long, the flowers will fully open and attract pollinators, which makes them unsuitable for cutting.
I’ve learned that poppies move from “not quite ready” to “too late” in mere minutes. So, be vigilant! When you see that slight crack, it’s your cue to act. Once harvested, the blooms will continue to open beautifully in a vase, providing you with the longest vase life possible.
Best Stage to Harvest Poppies for Vase Life
For the best results, always cut the stems deeply into the base of the plant. This encourages the plant to produce more flowers, ensuring a vibrant display. Remember, fully opened poppy flowers are not ideal for cutting. They are best left for the bees to enjoy.
For those interested in dried arrangements, Breadseed Poppies offer an exciting option. Allow the flowers to bloom and fade naturally before harvesting the pods. Once the buds start to spread and reveal their color, you can cut them for drying.
Managing Seed Pods for Decoration and Seeds
Seed pods are another fantastic aspect of poppies. Once the flowers have faded, you can collect the pods for decorative purposes. They can be used in arrangements or even saved for planting next season. When harvesting seed pods, aim to collect them just before they split open. A good indicator is when they rattle when shaken.
After harvesting, dry the pods in a warm, dry location. You can also bag them individually with cheesecloth to prevent seeds from spilling. For storage, keep the seeds in a glass container with a tight-fitting lid in a cool, dark place. This way, they remain flavorful for up to a year.
For more detailed tips on saving seeds, check out this informative guide.
In summary, remember these key points:
- Cut poppies at the “cracked bud” stage for the longest vase life.
- Timing is everything; act quickly to avoid losing blooms.
- Leave fully opened flowers for pollinators.
- Harvest deeply to encourage more blooms.
- Collect and dry seed pods for future use or decoration.
- Store seeds properly to maintain their quality.
Post-Harvest Care to Prolong Vase Life
To enjoy your freshly cut poppies for longer, specific post-harvest techniques are essential. After harvesting, the care you provide can make a significant difference in how long your blooms last. One of the first steps is to sear the stem ends to prevent sap from blocking water uptake.
Searing Stem Ends: Boiling Water and Flame Techniques
Immediately after cutting, you can sear the stem ends of your poppies. This step is non-negotiable since the white, sappy latex that drips from the stems will block water absorption, ruining your blooms. You can choose between two effective methods:
- Boiling Water: Bring water to a boil and dip the stem ends in for about 10 seconds. This seals them and locks in moisture.
- Flame Technique: Use a lighter, match, or even a propane torch to sear the ends until they are blackened. This method is not only effective but also a bit of fun!
Storage Tips and Vase Arrangement
After searing, place your poppies in cool water and keep them in a dark, cool location until you are ready to arrange them. This resting period allows the flowers to recover from the cutting process. Properly seared poppies can last several days in a vase, especially Iceland Poppies, which have the longest vase life among all types.
When arranging your poppies, use clean water and place them away from direct sunlight. Unopened flower buds may surprise you by blooming in a day or two. Even if they don’t fully open, they still add texture and a playful element to your bouquet.
In summary, remember to sear the stems right in the field as you harvest, or at least as soon as you get back inside. Speed matters here, and these simple steps will help you enjoy your beautiful poppies for days to come!
| Technique | Description |
|---|---|
| Boiling Water | Dip stem ends in boiling water for about 10 seconds to seal. |
| Flame Searing | Use a lighter or torch to blacken the stem ends for effective sealing. |
| Storage | Keep in cool, dark conditions after searing for best results. |
| Vase Arrangement | Use clean water and avoid direct sunlight for longer vase life. |
| Bud Opening | Unopened buds may bloom in a day or two, adding texture. |
Conclusion
As the gardening season wraps up, it’s time to reflect on the beauty and joy that these flowers bring. Growing poppies is one of the most rewarding experiences a gardener can have. Those delicate blooms make every spring morning feel magical.
Leaving a few spent flower heads at the end of the season allows your poppies to self-seed, ensuring they return year after year with little effort. If you prefer to try different varieties, simply deadhead the spent blooms to encourage new growth.
Poppies have a rich history, symbolizing remembrance from ancient Egypt to the red blooms on WWI battlefields. Whether you choose annual Shirley Poppies or perennial Oriental Poppies, these plants will reward you with beauty season after season.
Plant them in a permanent spot where they can naturalize and create a stunning display. Embrace the S.T.U.N. method—don’t overthink it, and let your poppies surprise you with their resilience and beauty.
Explore more about growing poppies and other cut flowers to build the garden of your dreams!